-->

Customize Input File using jQuery/CSS in PHP

This tutorial will teach you on how to customize input file using jQuery and CSS.
Note: Scripts and css used in this tutorial are hosted, therefore, you need internet connection for them to work.

Hiding our Input File

First step is to hide our input file. It will look something like this.
  1. <input type="file" name="file" id="file" style="display:none;" multiple>

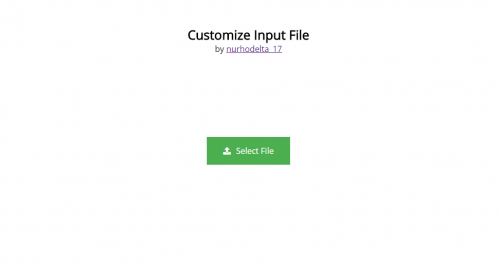
Creating a Substitute Button

Next we create a substitute button and will set a jQuery function that whenever this button is clicked, our input file will be clicked. It will look something like this.
  1. <button type="button" class="button" id="filebutton"><i class="fa fa-upload"></i><span id="filetext">Select File</span></button>

Creating our Example

Here's an example for you to further understand the topic.

index.html

We create our input file, substitute button, our css and source to our jQuery code in this page.
  1. <!DOCTYPE html>
  2. <html>
  3. <head>
  4. <title>Customize Input File using jQuery/CSS</title>
  5. <script src="<a href="https://ajax.googleapis.com/ajax/libs/jquery/3.1.0/jquery.min.js"></script>
  6. " rel="nofollow">https://ajax.googleapis.com/ajax/libs/jquery/3.1.0/jquery.min.js"></scri...</a> <link href="<a href="https://fonts.googleapis.com/css?family=Open+Sans"" rel="nofollow">https://fonts.googleapis.com/css?family=Open+Sans"</a> rel="stylesheet">
  7. <link href="<a href="https://maxcdn.bootstrapcdn.com/font-awesome/4.7.0/css/font-awesome.min.css"" rel="nofollow">https://maxcdn.bootstrapcdn.com/font-awesome/4.7.0/css/font-awesome.min....</a> rel="stylesheet">
  8. body{
  9. font-family: 'Open Sans', sans-serif;
  10. }
  11. .button {
  12. background-color: #4CAF50;
  13. border: none;
  14. color: white;
  15. padding: 16px 32px;
  16. text-align: center;
  17. text-decoration: none;
  18. font-size: 16px;
  19. margin: 4px 2px;
  20. cursor:pointer;
  21. font-family: 'Open Sans', sans-serif;
  22. }
  23. .hidden{
  24. display:none;
  25. }
  26. .h10{
  27. height:10px;
  28. }
  29. #filetext{
  30. margin-left:10px;
  31. }
  32. .title{
  33. font-size:25px;
  34. }
  35. .container {
  36. margin : 50px auto 0 auto;
  37. width:50%;
  38. }
  39. #filebutton{
  40. margin : 150px auto 0 auto;
  41. }
  42. </style>
  43. </head>
  44. <body>
  45. <div id="container">
  46. <div class="container">
  47. <span class="title"><strong><center>Customize Input File</center></strong></span>
  48. <span class="subtitle"><center>by <a href="<a href="https://www.sourcecodester.com/user/224918/track">nurhodelta_17</a></center></span>
  49. ">https://www.sourcecodester.com/user/224918/track">nurhodelta_17</a></cen...</a> <div class="h10"></div>
  50. <input type="file" name="file" id="file" class="hidden" multiple>
  51. <center><button type="button" class="button" id="filebutton"><i class="fa fa-upload"></i><span id="filetext">Select File</span></button></center>
  52. </div>
  53. </div>
  54. <script src="custom.js"></script>
  55. </body>
  56. </html>

custom.js

Lastly, our jQuery code.
  1. $(document).ready(function(){
  2. $('#filebutton').click(function(){
  3. $('#file').click();
  4. });
  5. $('#file').change(function(){
  6. var name = $(this).val().split('\\').pop();
  7. var file = $(this)[0].files;
  8. if(name != ''){
  9. if(file.length >=2){
  10. $('#filetext').html(file.length + ' files ready to upload');
  11. }
  12. else{
  13. $('#filetext').html(name);
  14. }
  15. }
  16. });
  17. });
That ends this tutorial. If you have any comments or questions, feel free to write it below or message me. Happy Coding :)