-->

Multiple Image Preview using jQuery PHP

Multiple Image Preview using jQuery PHP
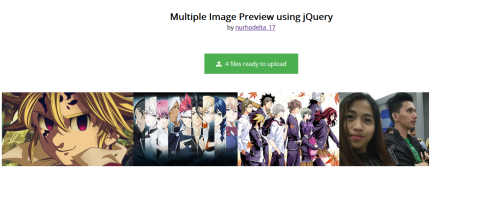
This tutorial will teach you how to preview multiple images before uploading using jQuery.
Note: jQuery used in this tutorial is hosted, so, you might need internet connection for it to work.

index.html

This contains our input file that we have customize and our preview area.
  1. <!DOCTYPE html>
  2. <html>
  3. <head>
  4. <title>Multiple Image Preview using jQuery</title>
  5. <script src="<a href="https://ajax.googleapis.com/ajax/libs/jquery/3.1.0/jquery.min.js"></script>
  6. " rel="nofollow">https://ajax.googleapis.com/ajax/libs/jquery/3.1.0/jquery.min.js"></scri...</a> <link href="<a href="https://fonts.googleapis.com/css?family=Open+Sans"" rel="nofollow">https://fonts.googleapis.com/css?family=Open+Sans"</a> rel="stylesheet">
  7. <link href="<a href="https://maxcdn.bootstrapcdn.com/font-awesome/4.7.0/css/font-awesome.min.css"" rel="nofollow">https://maxcdn.bootstrapcdn.com/font-awesome/4.7.0/css/font-awesome.min....</a> rel="stylesheet">
  8. body{
  9. font-family: 'Open Sans', sans-serif;
  10. }
  11. .button {
  12. background-color: #4CAF50;
  13. border: none;
  14. color: white;
  15. padding: 16px 32px;
  16. text-align: center;
  17. text-decoration: none;
  18. font-size: 16px;
  19. margin: 4px 2px;
  20. cursor:pointer;
  21. font-family: 'Open Sans', sans-serif;
  22. }
  23. .main{
  24. margin-top:50px;
  25. }
  26. .hidden{
  27. display:none;
  28. }
  29. .h10{
  30. height:10px;
  31. }
  32. #filetext{
  33. margin-left:10px;
  34. }
  35. .title{
  36. font-size:25px;
  37. }
  38. .container {
  39. margin : 50px auto 0 auto;
  40. width:50%;
  41. }
  42. #filebutton{
  43. margin : 50px auto 0 auto;
  44. }
  45. #preview{
  46. margin-top:50px;
  47. }
  48. </style>
  49. </head>
  50. <body>
  51. <div id="container">
  52. <div class="main">
  53. <span class="title"><strong><center>Multiple Image Preview using jQuery</center></strong></span>
  54. <span><center>by <a href="<a href="https://www.sourcecodester.com/user/224918/track">nurhodelta_17</a></center></span>
  55. ">https://www.sourcecodester.com/user/224918/track">nurhodelta_17</a></cen...</a> <div class="h10"></div>
  56. <input type="file" name="file" id="file" class="hidden" multiple>
  57. <center><button type="button" class="button" id="filebutton"><i class="fa fa-upload"></i><span id="filetext">Select File</span></button></center>
  58. <div id="preview"></div>
  59. </div>
  60. </div>
  61. <script src="custom.js"></script>
  62. </body>
  63. </html>

custom.js

This contains our jQuery for the input file custom and image preview.
  1. $(document).ready(function(){
  2. $('#filebutton').click(function(){
  3. $('#file').click();
  4. });
  5. $('#file').change(function(){
  6. var name = $(this).val().split('\\').pop();
  7. var file = $(this)[0].files;
  8. if(name != ''){
  9. if(file.length >=2){
  10. $('#filetext').html(file.length + ' files ready to upload');
  11. }
  12. else{
  13. $('#filetext').html(name);
  14. }
  15. }
  16. });
  17. $('#file').on("change", previewImages);
  18. });
  19. function previewImages() {
  20. var $preview = $('#preview').empty();
  21. if (this.files) $.each(this.files, readAndPreview);
  22. function readAndPreview(i, file) {
  23. if (!/\.(jpe?g|png|gif)$/i.test(file.name)){
  24. return alert(file.name +" is not an image");
  25. } // else...
  26. var reader = new FileReader();
  27. $(reader).on("load", function() {
  28. $preview.append($("<img>", {src:this.result, height:200}));
  29. });
  30. reader.readAsDataURL(file);
  31. }
  32. }